Some time ago I decided to build a shelf to hold my 3D printers. Coincidentally, around the same time our neighbors decided to throw out their microwave oven. Microwaves contain a formidable transformer, so I took it inside and gutted the interesting bits before returning the remainder to the trash.

A word of warning: opening a microwave oven is dangerous: the capacitor can retain enough energy to kill you despite being unplugged, the magnetron can contain beryllium oxide, which if broken into powder and inhaled can kill you, and finally, the transformer puts out enough current to kill you before you hit the ground. In retrospect, this project probably wasn’t worth the micromorts.
Lichtenberg Figures are branching patterns formed by high voltages. If you happen to survive a lightning strike, you might end up with a Lichtenberg figure on your skin. You may note that this would make a pretty badass tattoo.

Golf courses are also known to exhibit Lichtenberg figures after lightning strikes.

This pattern is called a brownian tree and is typically produced by a process called diffusion-limited aggregation. Copper precipitated using electro deposition follows this pattern.

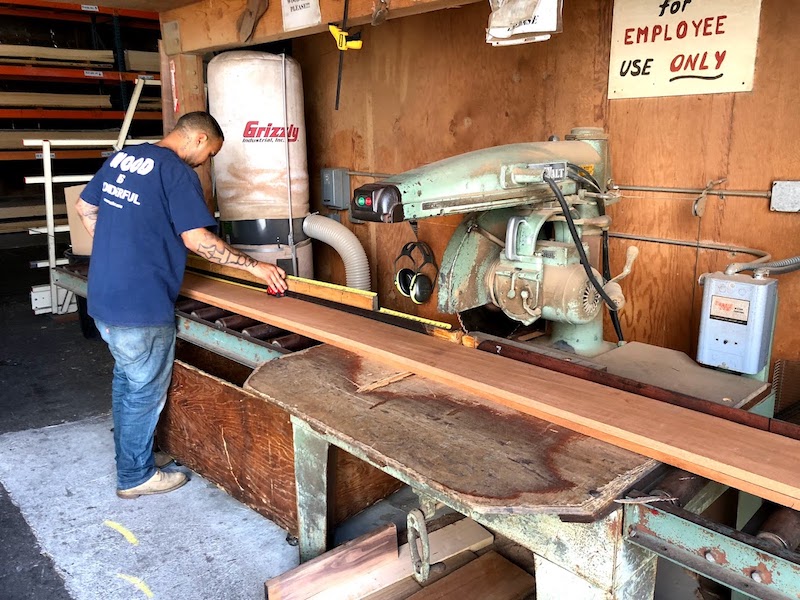
I decided to decorate my shelf with Lichtenberg figures. I started by visiting my favorite hardwood store and buying a piece of African Mahogany.
I also bought some high voltage wire and mounted the transformer on a piece of rubber and a few blocks of wood to make it harder to accidentally short it.

I attached wood screws to the wires to use as electrical probes. The current won’t flow through dry wood, so I used a solution of baking powder and water which I painted on with a brush.
Again, this is dangerous: the transformer puts out around 2200 volts at 0.5 amps. I needed to move the probes many times to make my design, so I created a procedure where I would check to see it was unplugged, then saying “unplugged” to myself out loud before approaching. Before plugging it back in, I’d step back, check that everything was clear and say “powering on” before plugging it back in.
After some trial and error with the electrolyte solution I started making progress. My first attempt was crude with big char marks.


Having proven the concept, it was time to build the shelf. I didn’t have a table saw so I made do with a six foot straight edge clamped in place and a handheld circular saw. This method is is a huge time consuming pain but it works.

Most of the hours in this project came from the fact that the wood I had wasn’t wide enough, so I had to cut and join together two pieces for every part of the shelf. Here are some pieces curing while clamped together.

After joining all the pieces, I gave them a good sanding to make all the edges even. I was proud to note that on some pieces you can’t even tell it’s made of two pieces of wood.


After a several hours of experimenting I discovered how to make the burn patterns I wanted. There’s an art to it: if you just leave the probes in place, the current will either evaporate all the solution and stop conducting, or it’ll find a path between the terminals and your wood will be on fire.
Creating a pattern that resembles a lightning bolt requires moving the probes hundreds of times. I learned to control the size of the burn features by controlling the amount of solution. The more solution, the more current, the thicker the burn mark. To create a lightning pattern, I used a lot of solution to create a thick central burn, then repeatedly moved the probe off to the sides and used less solution to create smaller features, then moved the probes off to the side of those features and used less solution still to make even finer details. You can see a time-lapse of this process below. Note this is spend up around 10x – in reality there is a substantial pause between the current being on and my hand being near the probes.
Each board I did was better and less charred than the last. I decided to make my first attempt (not pictured) the bottom of the bottom shelf where no one would see it. My last and best attempt became the top of the top shelf.

After all the burns were made I used a wire brush to get as much charred wood out of the burns as possible. Then I washed off the soot, gave it another sanding, used a piece of tack cloth to remove any dust, and finally applied Osmo Polyx oil.
The finished piece: